Tuesday, March 8, 2011

Ruffled Pillowcase Tutorial

I asked Ellie from Homestitched to share with us her tutorial for these fun pillowcases she made.  I love how fun they are.  Thanks Ellie!
 
I saw these on the Anthropologie website and knew I needed them.  But who wants to pay $48 dollars for a pillow case?
So I made theses instead. 
I think they turned out pretty great.  Plus I finally got to use this cream and white stripped fabric I've been dying to use but haven't found the right project for.
I used the tutorial from MADE for pillow case dimensions and basic assembly.  If you need it, I suggest going there for extra help.
Materials:
About 1 3/4 yards of fabric
Wooly nylon serger thread (optional)
1.     Construction:
    
1.  1.  Cut Material.  Use the chart below.  You will end up with 4 rectangles.  All dimensions below are in inches.
Rectangle
Folded
Unfolded
Main Piece 1
20.5 X26
45 X 26
Main Piece 2
20.5 X 11
45 X 11
Ruffle 1
45 X 6
90 X 6
Ruffle 2
45 X 7
90 X 7
Again, MADE has some diagrams here that might be helpful for the main pieces.  The ruffled pieces will look like this (folded in fourths):
I happened to have a large piece of fabric to use.  If you do not, you may need to sew two pieces together to get the correct length for the ruffled pieces.  This will be perfectly fine.  The ruffles will hide any seams you don't want showing.
2.  Iron the border piece in half so that you have a folded rectangle measuring 11" X 20.5".
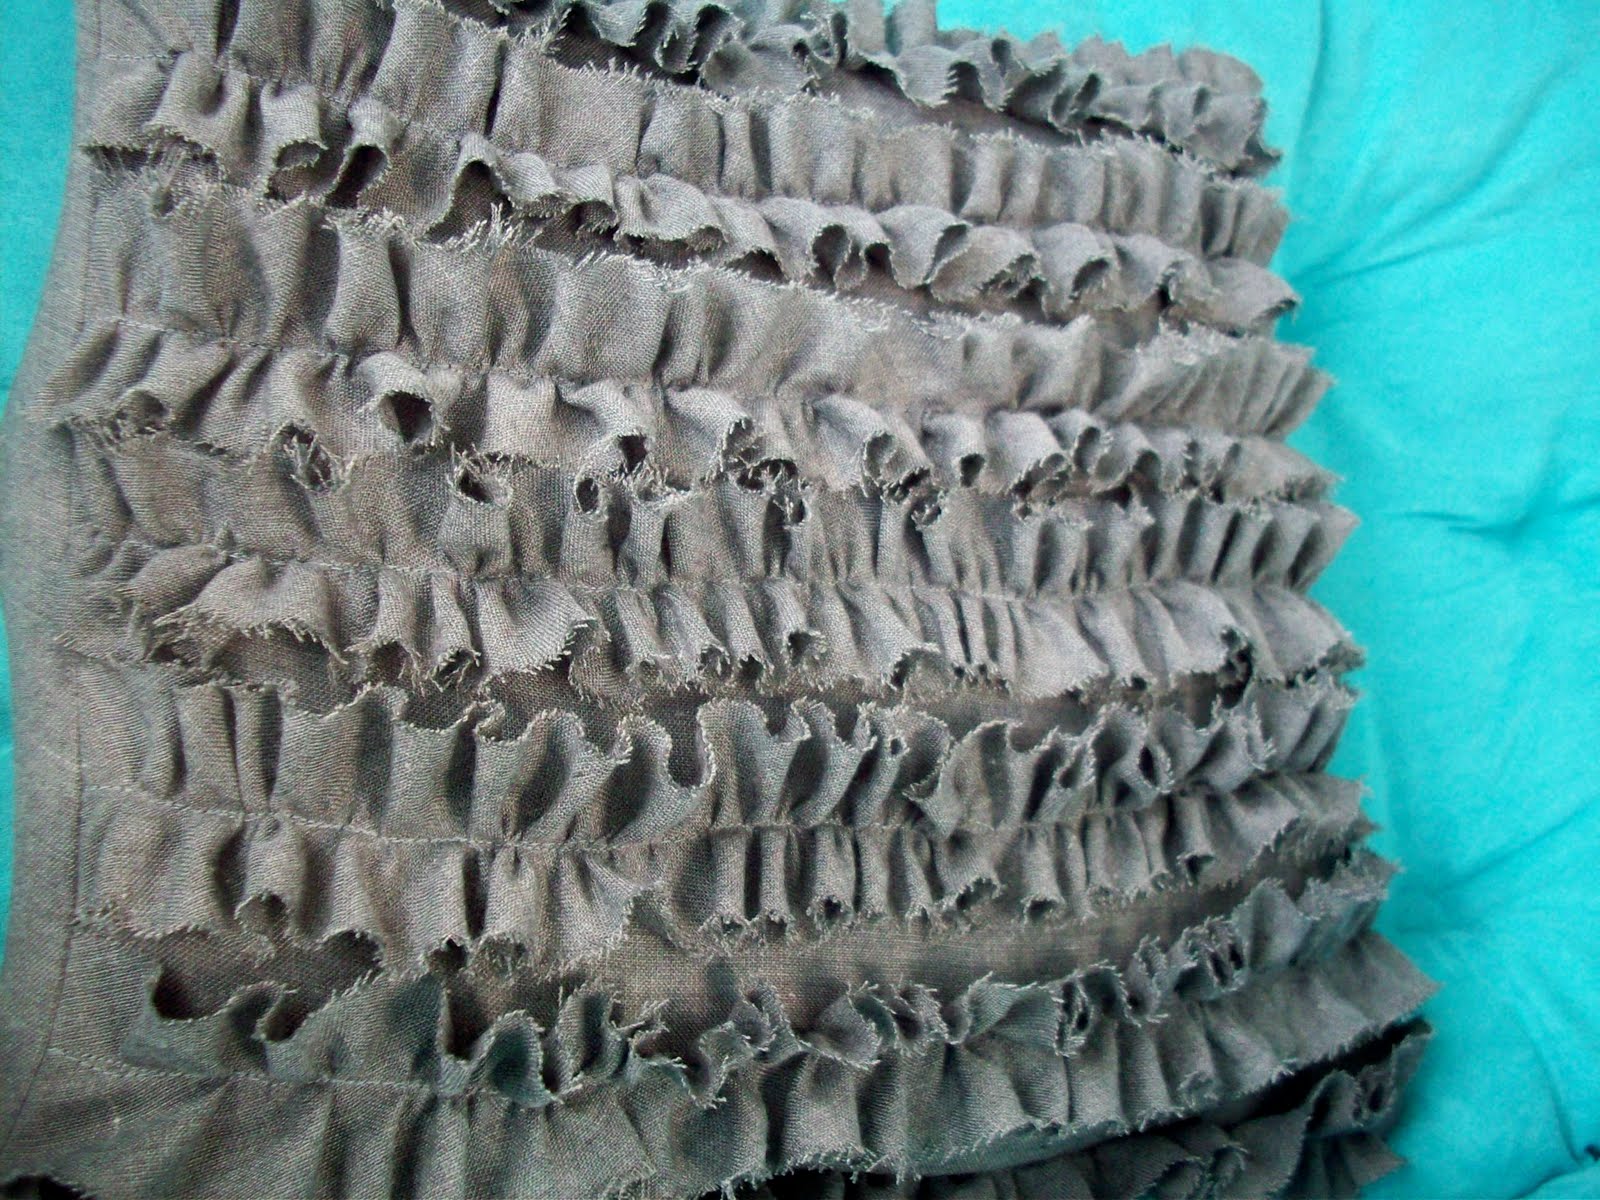
3.  Serge edges.  Take both ruffle pieces and serge the long edges of each to prevent from fraying.  I used wooly nylon thread and set my machine up to do a rolled hem to get the effect you see in my pictures (see your owners manual for set-up). 

**If you do not have a serger I suggest doing a tight zig zag and triming the edges or using a rotary cutter to trim the edges to keep from fraying.  Some sewing machines can also do a rolled hem.  Check your manual.  You may need an extra foot to do so.
4.  Iron.  Take the 6" ruffle piece and iron almost in half.  I allowed the bottom layer to show about 1/2 an inch (as shown below).  Make sure the serged edges you want showing are facing up. 
5.  Gather.  Set your sewing machine up for a gathering stitch (longest stitch length, highest tension).  Sew about 1/4 inch down the folded edge.  Do not back stitch at the front or end of the stitch.
Leave your settings the same and sew two gathering stitches about 1 1/2 inches from each side of the other strip. 
Take the bobbin thread of the folded piece and pull until the piece begins to gather.  Gather until it reaches the same length as the border of the pillow case.
Do the same for the other ruffled piece. 
I like to lay my pieces out on the pillow case to make sure I have gathered them to the correct length. 
Iron the ruffles down.  This will make it easier to sew. 
6.  Pin.  Take the folded ruffle.  With right side up, align it with the edge of the pillow case where the border piece will attach.  Then take the border piece and align the raw edges, right sides together to create a sandwich. 
Like this.

Pin in place.

7.  Sew.  With a 1/2" seam, sew the sandwich together.

Thread your serger back to normal.  Serge of the seems.  Or zig zag stitch and trim.

Turn and Iron out the seams.  No need to top stitch.  This part will be covered. 
Now you should have this.
8.  Pin.  Align the the next ruffled piece with the top edge of  the border so that the ruffles just cover the border underneath but still allow the ruffles to show at the other end.  Pin in place.
9.  Sew.  Secure the ruffle by sewing in two places.  I sewed directly over  the gathering stitches that were already on the ruffle.  If the gathering stitch is not straight, do your best to sew a straight line as this will be visible on the completed pillow. 

Use your hand to flatten down the ruffles as you sew.

Unpick any gathering stitches that are not in line with the new stitch.

Now you should have this.

Originally I planned to sew 1/4" bias tape over the top of the stitching.  I liked how it looked when I got to this part, so I left it off.  Your call.
10.  Finish.  Fold the pillow case right sides together.  Pin edges and sew a 1/2 inch seam allowance.
 

Sege off the seems or zig zag and trim.

Turn pillow case so right sides are out and push out corners.  Iron seams flat.

Put that pillow case on your pillow and rest your head a little.

Or play a little.  Whichever you prefer.
Be careful..things might get a little too crazy.
So don't be surprised when your model gets grumpy and decides to take a nap instead.

Be sure to head on over to Homestitched and check out her amazing site.  She has many great projects like the following:

Creative Mess Subway Art

Shirred Overalls

Thursday, March 3, 2011

Bunny Tutorial—Guest Post from Little Eme


  Maleah is the creator behind the blog Little Eme.  Have you seen this blog?  Maleah has so many great projects and fun ideas that I know many of you will enjoy it.  I asked Maleah if I could share with you her cute Bunny pattern and tutorial with you.  Here is Maleah in her own words…

Announcing the:

Tuesday, March 1, 2011

Side Bar Giveaway #3 Winners

Here are the winners of  The Idea Room sidebar text link giveaway!  Congratulations everyone!  I will be getting your links up as soon as possible.  If you did not leave the link you would like added in your comment…please send me one or leave it in the comment section below this post!  Thanks to everyone for playing along!

Sunday, February 27, 2011

Side Bar Space Giveaway...#3!

**This giveaway is now CLOSED**
Time for another sidebar text link giveaway! Enter your link here for a chance to win one of five spots on The Idea Room Sidebar. One comment per person please. Giveaway ends soon!

Friday, February 18, 2011

Calling All Angels--Service Opportunity

My husband and I wanted to do a service project in honor of our son Jayden’s 1 year birthday. He was born at 23 weeks old on May 30, 2009 and was just too small to pull through. We posted the service idea on our blog and entitled it “Calling All Angels” asking anyone that wanted to could help by donating baby blankets. We were overwhelmed by the outpouring of support we received by so many, friends, family, and even strangers.

Thursday, February 17, 2011

Let’s Help Bring Brady Home!

I have mentioned before that I would love for this community to be something were we can work together and create a network of support for our causes and a place where we can come and discuss and share ideas with each other.  I hope you will become a follower and join with us so it can continue to grow.

One of my readers, Cathy from Cap Creations, contacted me about helping her get the word out about a special cause that is dear to her heart. 

Monday, February 14, 2011

Disney On Ice Giveaway Winner #3


Who won the Disney on Ice Tickets?

disney3 

Commenter #2 Amber Hall…I have two little girls who would love nothing more than to see this show.

Congratulations Amber!  Send me an email {2theidearoom@gmail.com} to claim your 4 tickets!  Thanks everyone for playing along!

Saturday, February 12, 2011

Pillow Tutorial--Guest Post From Ameroonie Designs


Hi there Idea Room Community! I'm Amy from Ameroonie Designs. Amy was so kind to let me come over and spend some time with all you lovely people! I am thrilled to share with you my tutorial on how to make this side-tie pillow. I have to admit- this is one of my favorite pillows to make. I love that it lets me show off a fabric, while adding texture with the bows. (you can see the others I have made here and here).
First you will need to start with a pillow form. This will dictate the measurements of the fabric you are cutting. The pillow I made was 12" by 16". You will need to cut: 1 pillow back- the measurements of your pillow + 1" (mine was 13" X 17"), 2 pieces for the front- take the length of the front piece (on mine 17), divide by 2 (I rounded up to 9) and add 4"- (my pieces were 13" X 13"). This will give you enough off-set that the bows will be on the side- but you are welcome to adjust the measurements (make one longer so the bows will be even further to the edge). Then you will need six ties. I am using a wool felt for this pillow, so I'm not worried about fraying- so mine are 13" by 3/4", but if you are using a fabric that frays, make the ties 1 1/2" so you can fold in the edges. (you can make the ties longer if you want a larger bow- but I'd keep them no longer than about 16" or they just get too long)
Take your ties and fold them in half. {If it's a fabric that frays you will press this fold, open it up, bring the raw edges into the fold line and press those folds. Then re-fold the center crease so the raw edges are tucked into the center. Fold up one short end into the crease so the raw edge is hidden.} Then edge stitch both sides of the tie- keeping the folded edges as close together as you can. Set them aside.
Take your two front pieces. Hem one side of each front panel by first folding the edge over 1", press, then fold over another 1". Top stitch at 3/4" and edge stitch the fold. (make sure the sides you're hemming are the ones you want to overlap. Lay the back panel of the pillow on a flat surface. Line up the top pieces so they overlap, using the back panel as a guide for the width of the pillow.
Take the front panel that will be on top of the pillow and fold it in half along the hemmed side. Mark the center with a pin.
Decide how far apart you want your ties to be- remembering that you will be sewing around the perimeter with a 1/2" seam allowance to finish the pillow. Mine were 3". Mark each measurement from the center pin.
Now we're going to place the ties. If you are using a fabric that frays- you will pin them down as shown by the tie with the pink pin, folding over the end about 1/2". When placing the tie onto the panel that is underneath, I usually put the tie about 1/4" from the edge of the top panel. Pin all the ties in place and sew them down. We're almost done! But this is the step that always makes me stop and think- so follow along with me! Take your back panel and place it on a flat surface RIGHT SIDE UP. Now take the front panel that will be on the TOP (ties should be sewn close to the hemmed edge) and place it on the back panel RIGHT SIDE DOWN. Match up the corners and edges and pin in place. Now take the remaining panel and pin it down. Make sure all the ties are tucked into the middle and won't get caught in the seam, or interfere with the placement of the front panels.
Here it is all ready to be sewn. Sew around the entire pillow using a 1/2" seam allowance. Clip all the corners and turn the pillow right side out. Use a tool to push out the corners as much as you can. Now just insert your pillow form and tie your bows!
Some more shots of the pillows. I'm loving this gray, now I'm wondering where in my house I can put some!


Have Fun!
xoxo,
Amy

Thanks so much Amy.  We love them!  To see more great projects make sure and head on over to Ameroonie Designs and check out Amy’s other great projects and tutorials.  Like this Happy Birthday Banner

000_0001

And this adorable Faux Chenile Valentine Pillow!

 000_0154